> ## Documentation Index
> Fetch the complete documentation index at: https://docs.binderhr.com/llms.txt
> Use this file to discover all available pages before exploring further.
# 2. 시퀀스 생성하기
> 해당 페이지에서는 프로젝트를 구성하는 시퀀스에 대한 개념 및 사용 방법에 대해 소개합니다.
## 1. 시퀀스
시퀀스는 타임라인을 구성하는 개체입니다. 입사일을 기준으로 '입사 14일 전 시퀀스', '입사 3일 후 시퀀스'등을 생성할 수 있습니다.
시퀀스를 생성하여 할 일을 추가할 수 있습니다.
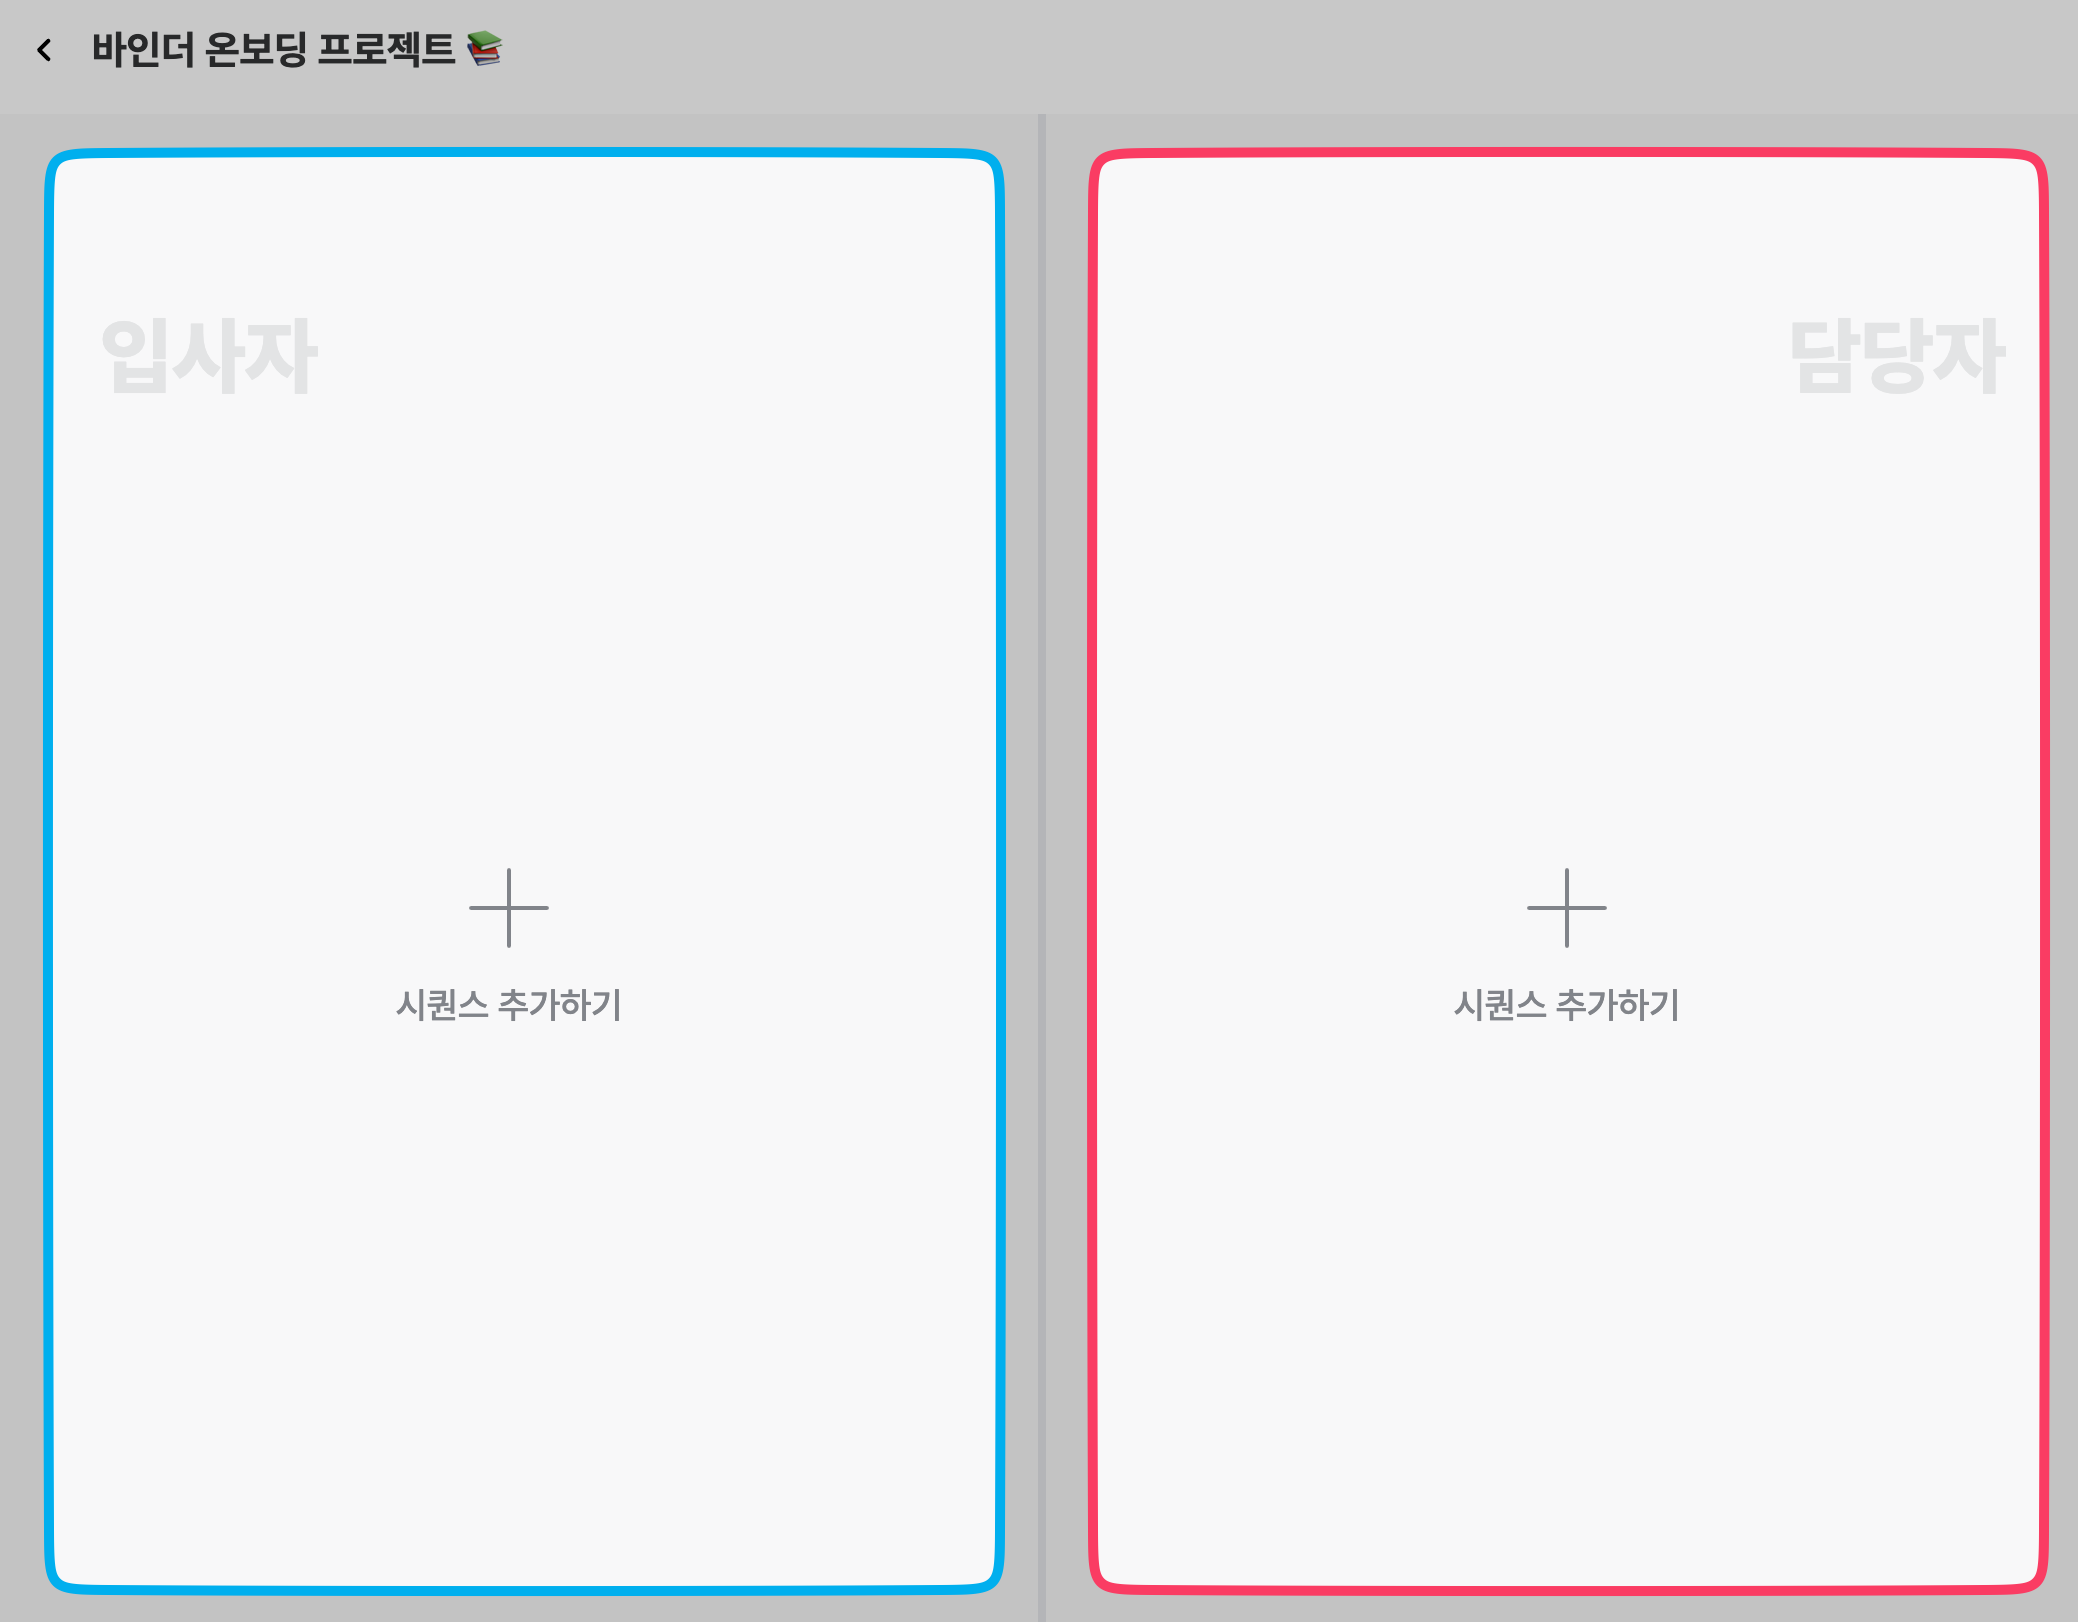 좌측은 신규 입사자들의 시퀀스를 구성할 수 있으며, 우측은 온보딩 담당자들의 시퀀스를 구성할 수 있습니다.
***
## 2. 시퀀스 추가하기
### 2.1 입사일 기준 시퀀스 추가하기
좌측은 신규 입사자들의 시퀀스를 구성할 수 있으며, 우측은 온보딩 담당자들의 시퀀스를 구성할 수 있습니다.
***
## 2. 시퀀스 추가하기
### 2.1 입사일 기준 시퀀스 추가하기
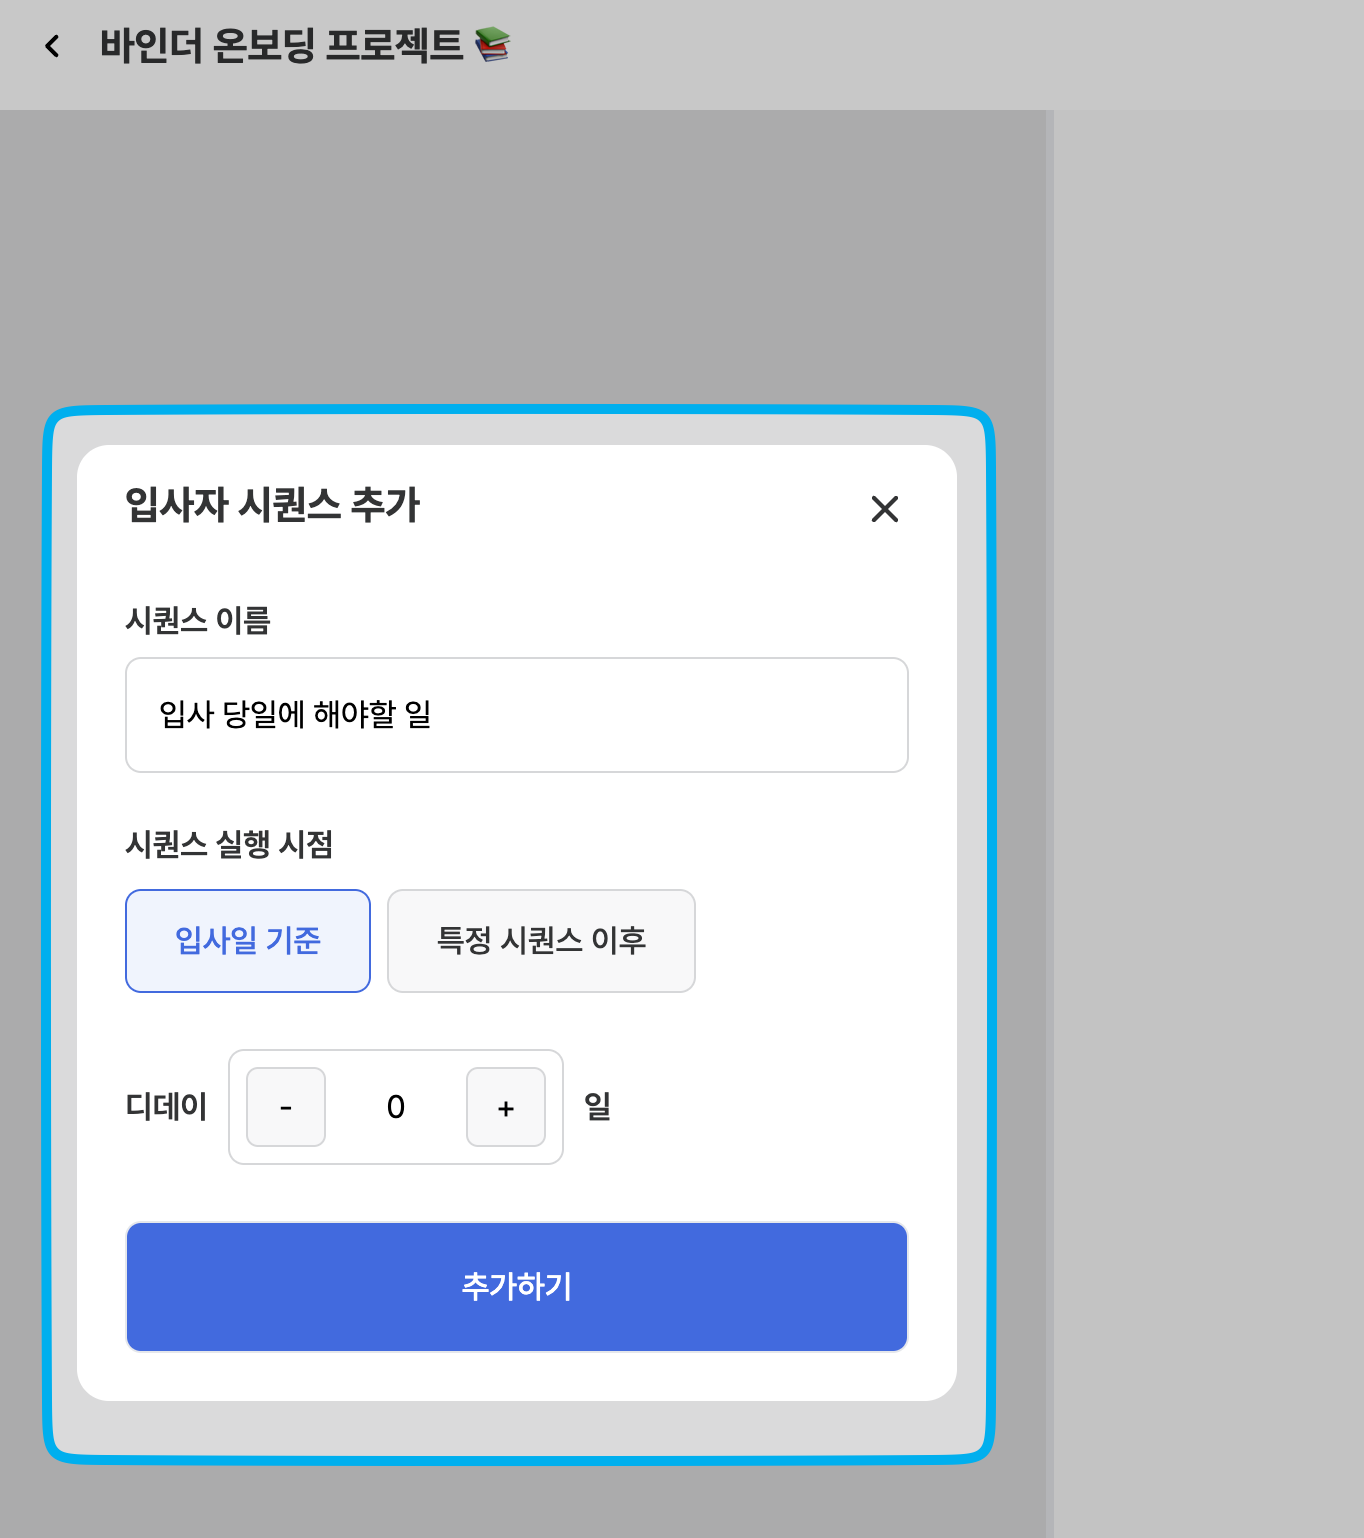 시퀀스 이름은 온보딩 이해관계자들에게 노출되지 않으며, 관리자가 시퀀스를 구분하기 위해 작성하는 란입니다.
입사일을 기준으로 디데이를 수정하여 일자 별로 해야할 일을 구성할 수 있습니다.
시퀀스 이름은 온보딩 이해관계자들에게 노출되지 않으며, 관리자가 시퀀스를 구분하기 위해 작성하는 란입니다.
입사일을 기준으로 디데이를 수정하여 일자 별로 해야할 일을 구성할 수 있습니다.
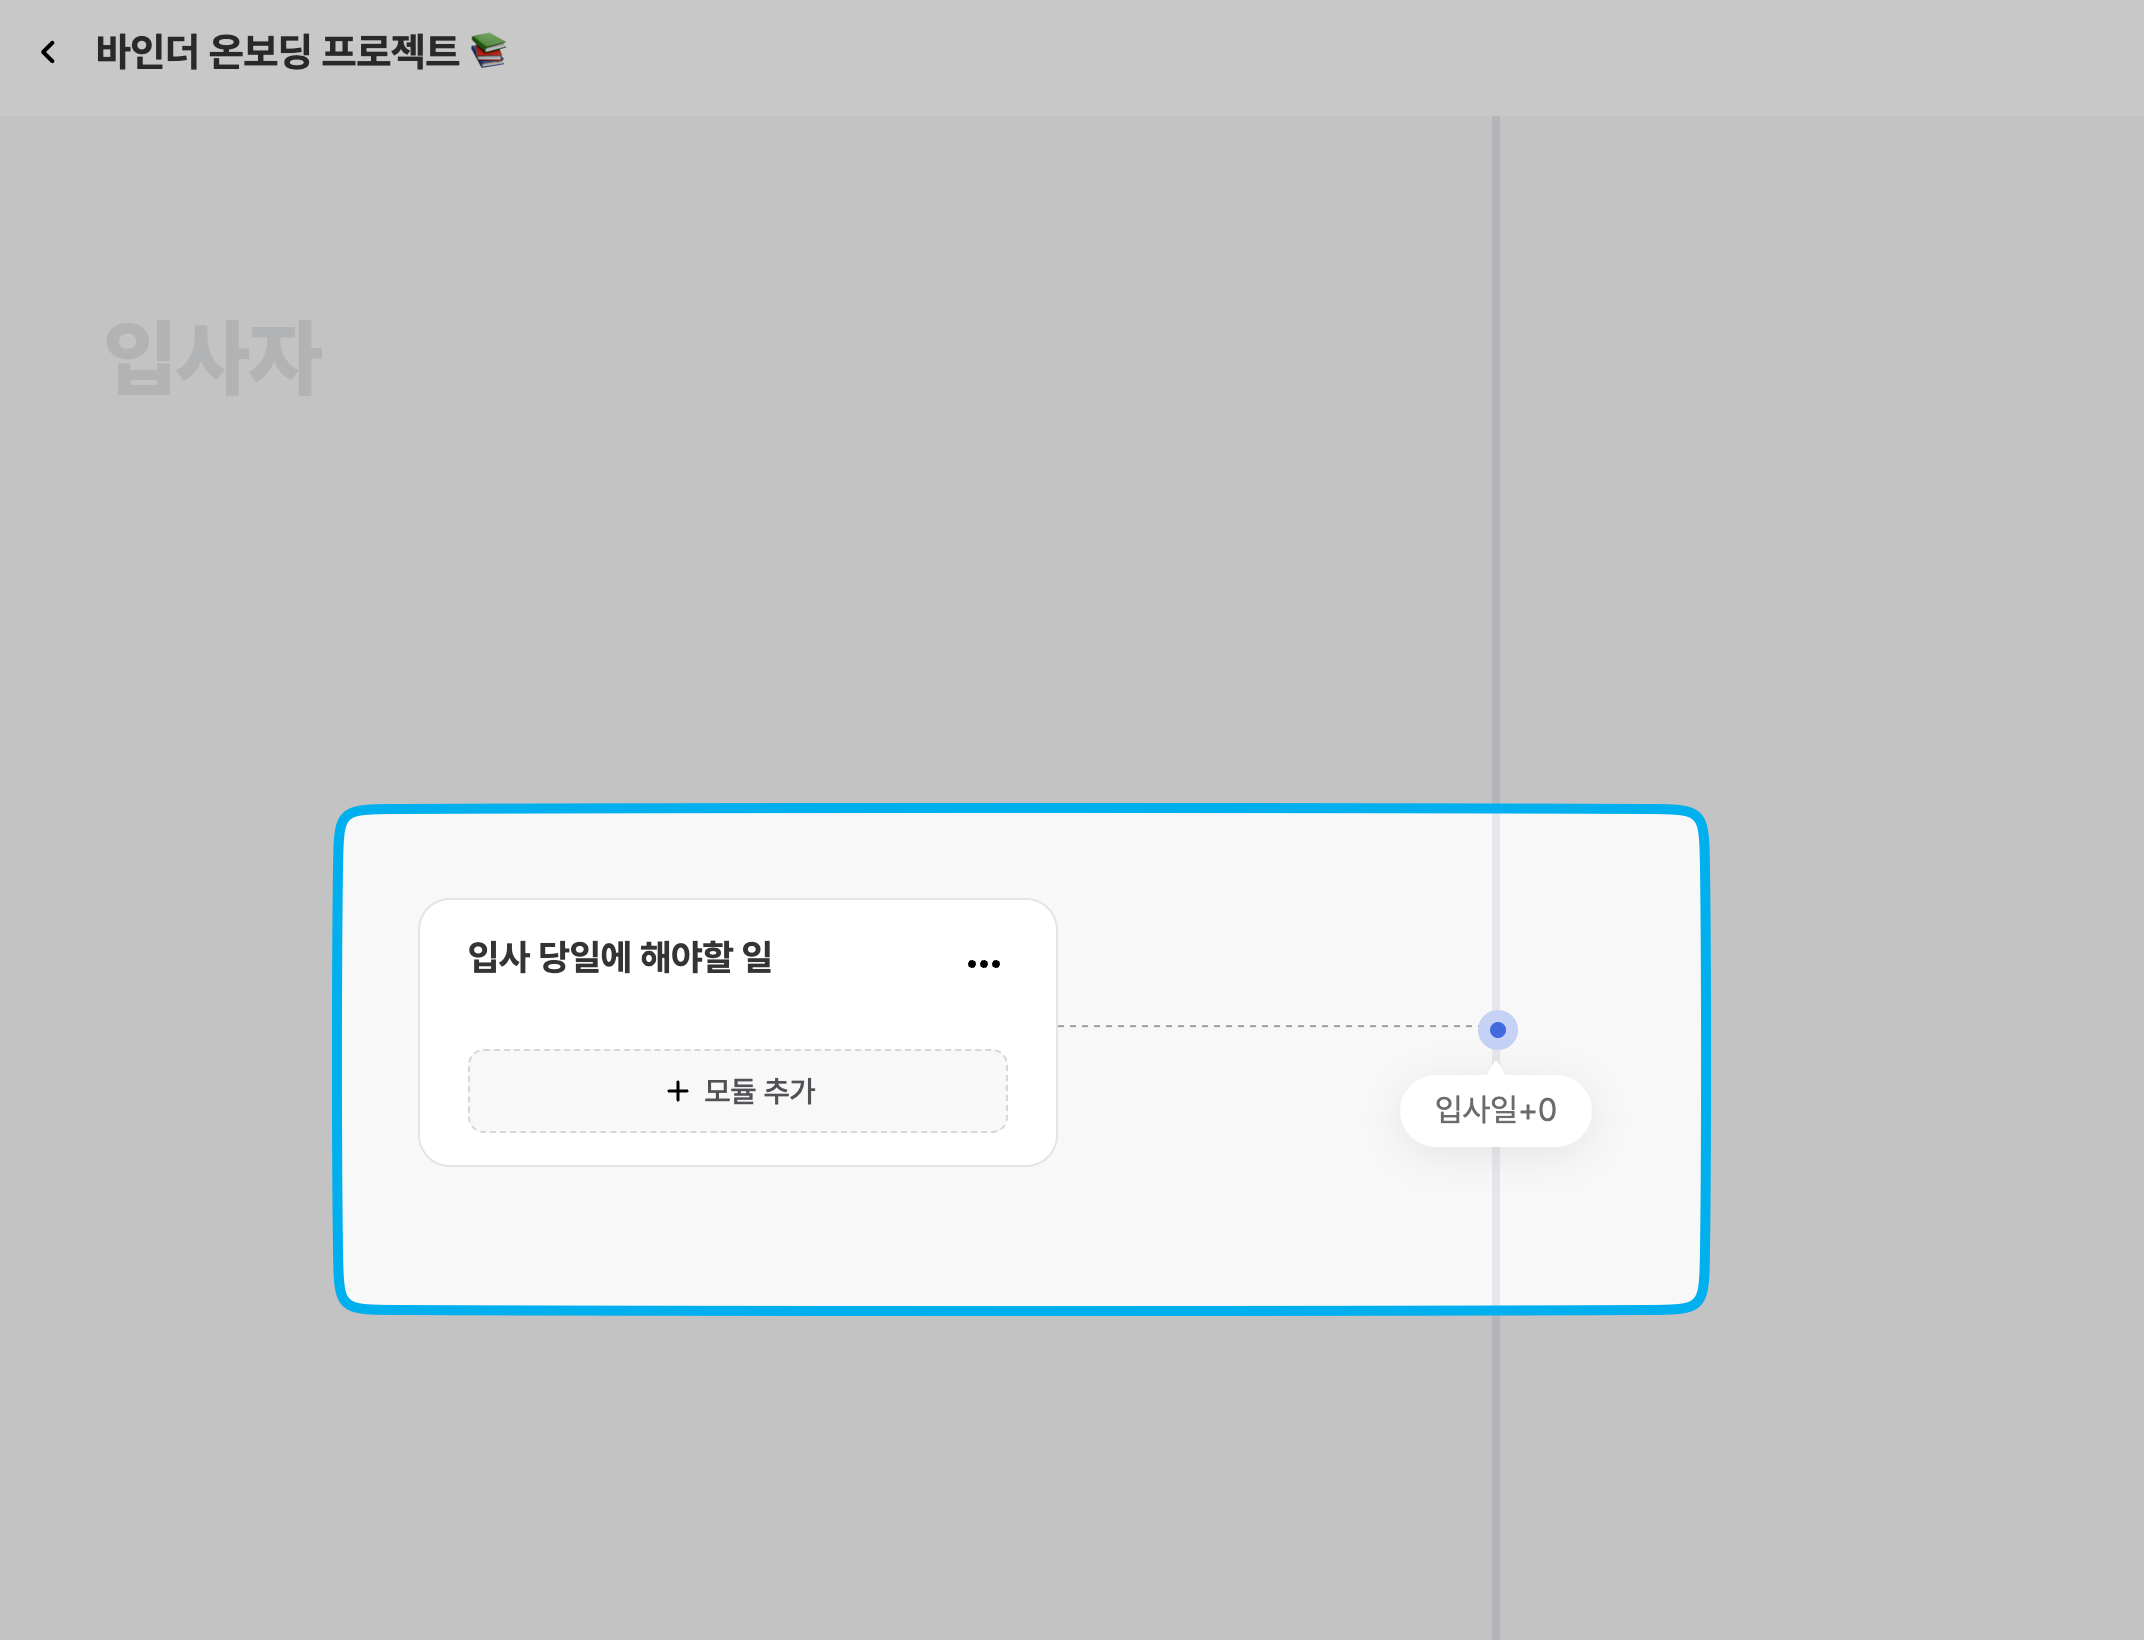 시퀀스를 추가하면 가운데 타임라인에 시퀀스가 생성된 것을 확인할 수 있습니다.
### 2.2 특정 시퀀스 이후에 실행시키기
어떤 시퀀스가 수행이 완료됐을 때를 조건으로 실행되는 시퀀스입니다.
예시 : 신규입사자가 서베이로 장비를 선택 완료하면 총무팀에게 알람을 발송시킬 수 있습니다.
시퀀스를 추가하면 가운데 타임라인에 시퀀스가 생성된 것을 확인할 수 있습니다.
### 2.2 특정 시퀀스 이후에 실행시키기
어떤 시퀀스가 수행이 완료됐을 때를 조건으로 실행되는 시퀀스입니다.
예시 : 신규입사자가 서베이로 장비를 선택 완료하면 총무팀에게 알람을 발송시킬 수 있습니다.